Sunday, March 28, 2010
Pipecleaner man & Wire Armature
These are not my work.
I was not at this class but as I want to have all these activities available to me I am including them in my portfolio.
Pipecleaner Man:
-fold in half, make a loop for the head
-twist at the hips and then make the legs
-a good preclude to the wire armature
Wire Armature:
-take a piece of wire about the length of your armspan
-fold in half, make a loop for the head
-make the arms 3 head lengths long
-twist for the torso
-extend hips and legs
-you can build it up with foil and then papermache.
Plastercine on Styrofoam
Landscape with Water Colour
Tessellation and Painting techniques
Tessellation: cut out a figure, then trace it over and over again
Scraffito: paint and then scratch the surface
Pointillism: point with various dots
Gradated Wash: add colour, then add water
Dry Brush: put paint on brush, then wipe off and point.
Frottage: add separate colours, add water to blend
Wet on Wet: wet the paper, then add wet paint
Sponge Painting: paint ith sponge dipped in paint
Oil Pastel resist: put oil pastel, then paint (they will resist)
Complimentary colour Wheel
Monochromatic Scale
Colour Wheel and Mixing Colours
Primary Colour Wheel
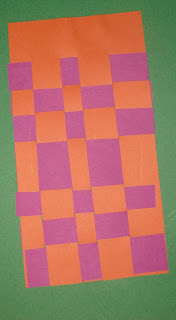
Straight Weave and Organic Weave
Principles of Design
Perspective of a Circle
Two Point Perspective
-Draw the horizon line in the middle of the page
-draw the vanishing point on each side of the line
-draw a vertical line that extends above and below
-extend lines to the vanishing points
draw vert lines to close the building
-make sure windows follow the vanishing points too
I found a video on YouTube so I thought I'd throw it in here too, it's a good demonstration.
http://www.youtube.com/watch?v=UMNG2xBq8dA
Block Name in one point perspective
One Point Perspective
Transparent box
-Draw the horizon line
-draw the two vanishing points on the line
-draw a vertical line
-extend lines on the top and bottom of the vanishing points
-draw vertical line to connect the top and bottom
-now that the outside of the box is done:
-draw a vertical line up the back of the box (where th corner was created)
-start at the corners and draw a line to the opposite anishing point to connect to the inside corner.
Still life with Different Mediums
These are representations of still life works using different mediums.
I must clarify that these are not my works, I was not able to make it to the class where these were done and thus did not have the different mediums that they required.
1)Still life collage
2)Still Life with Pastel and Water Colour
3)Still Life with Chalk
4)Still Life with Pastel
5)Still life with chalk on Coloured paper.
Shading with Words
Still life with Marker and Water
Self Portrait
Cartoon Faces
fun for kids to draw different expressions.
Here is a link to a YouTube video that can help:
http://www.youtube.com/watch?v=oNZCcz4MBcs
Here is a link to a YouTube video that can help:
http://www.youtube.com/watch?v=oNZCcz4MBcs
Proportions of the Body
Portions of the face
-eyes in the middle of the face
-the head is 5 eye widths wide
-the eyebrows shape the face, often when someone has a strong resemblance it is because of the eyebrows
-the centre of the eye is the outside corners of the mouth
-the inner corners of the eye determine the width of the nose
-the bottom of the eyebrow is where the top of the ear is
-the bottom of the nose is where the bottom of the ear is.
Blind and Semi-blind Contour Drawings
Gesture Drawings
Subscribe to:
Posts (Atom)